步进电机控制示例
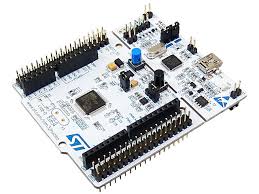
使用 SimpleFOCShield 和 Stm32 Nucleo-64
在这个步进电机控制示例中,我们将使用以下硬件:
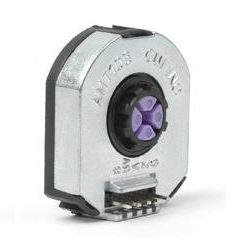
可在此处下载图片和 Youtube 视频中使用的 nema17 上的 amt103 安装座的 STL 文件以及 STEP 和 solidworks 项目。
连接所有部件
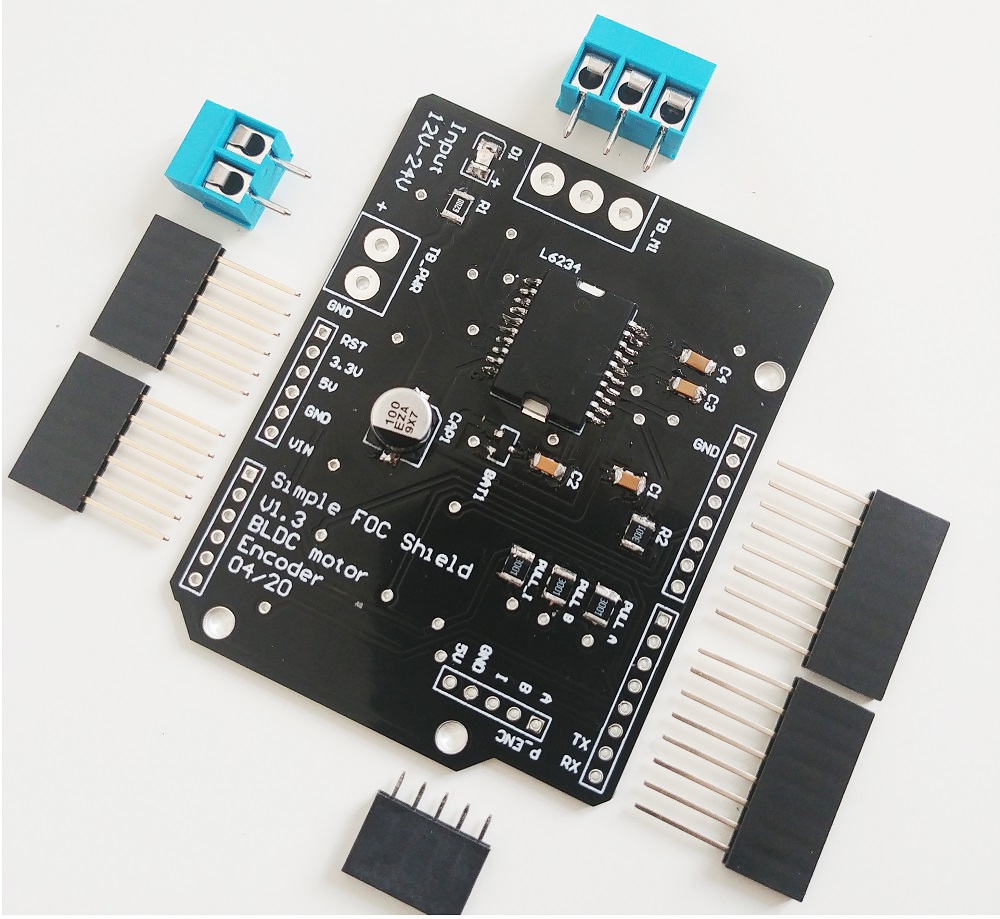
以下是使用 SimpleFOCShield 和 Nucleo-64 的连接方案示例:

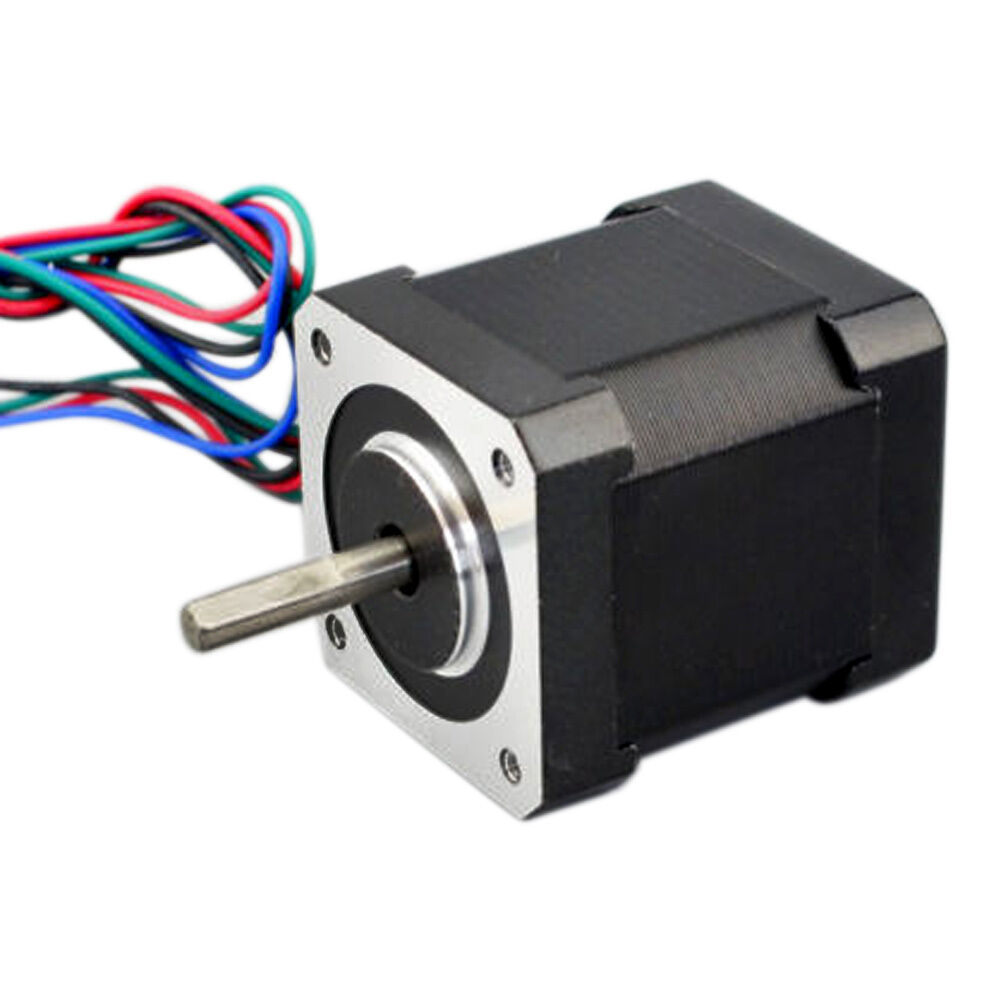
使用 3 相连接 Nema 17 步进电机
由于 nema 17 步进电机有 2 相和 4 根线,我们需要将它们转换为 3 相才能连接到 SimpleFOCShiled。因此,我们将每个相的一根线分别连接到屏蔽层,每个相的第三根线将连接在一起作为公共相。
| 引脚 | Nema 17 线 | 屏蔽相 |
|---|---|---|
| 1 | A+ | A |
| 2 | B-、A- | B |
| 3 | B+ | C |

- 电机相
A、B和公共端直接连接到电机端子连接器TB_M1
将两根线
+或-连接到哪个引脚并不太重要,只要公共引脚2连接了两个相的线即可。否则电机将无法工作。
SimpleFOCShield 连接

| 信号 | Pwm A | Pwm B | Pwm C | 使能 | 编码器 A | 编码器 B | 编码器 I | 电流 A | 电流 B |
|---|---|---|---|---|---|---|---|---|---|
| 引脚 | 6 | 10 | 5 | 8 | 3 | 2 | 4 | A0 | A2 |
编码器
- 通道
A和B连接到编码器连接器P_ENC的端子A和B。 - 索引通道也可以直接连接到
P_ENC的端子I
Arduino 代码
在混合配置中使用 SimpleFOClibrary 控制步进电机时,有几点需要注意:
- 电机配置为
HybridStepperMotor而不是StepperMotor
HybridStepperMotor motor = HybridStepperMotor(50);
- 驱动器引脚顺序很重要,应该是:
A相B相- 公共引脚 在本示例中,我们使用
BLDCDriver3PWM驱动器
// IMPORTANT: the order of the pins is important, it should be:
// 1. Stepper A phase (shield pin A)
// 2. Stepper B phase (shield pin C)
// 3. common pin (shield pin B)
BLDCDriver3PWM driver = BLDCDriver3PWM(6, 5, 10, 8);
以下是使用SimpleFOCShield和 Stm32 Nucleo-64 控制步进电机的完整代码示例:
#include <SimpleFOC.h>
// Stepper motor
HybridStepperMotor motor = HybridStepperMotor(50);
// BLDC driver instance
// SimpleFOCShield
BLDCDriver3PWM driver = BLDCDriver3PWM(6, 5, 10, 8);
// encoder instance
Encoder encoder = Encoder(2, 3, 2048);
// channel A and B callbacks
void doA(){encoder.handleA();}
void doB(){encoder.handleB();}
// inline current sensor instance
// ACS712-05B has the resolution of 0.185mV per Amp
// NOTE: LowsideCurrentSense sense is used because its faster than InlineCurrentSense class
LowsideCurrentSense current_sense = LowsideCurrentSense(185.0f, A0, A2);
// commander communication instance
Commander command = Commander(Serial);
//void doMotion(char* cmd){ command.motion(&motor, cmd); }
void doMotor(char* cmd){ command.motor(&motor, cmd); }
void setup() {
// use monitoring with serial
Serial.begin(115200);
// enable more verbose output for debugging
// comment out if not needed
SimpleFOCDebug::enable(&Serial);
// initialize encoder sensor hardware
encoder.init();
encoder.enableInterrupts(doA, doB);
// link the motor to the sensor
motor.linkSensor(&encoder);
// driver config
// power supply voltage [V]
driver.voltage_power_supply = 20;
driver.init();
// link driver
motor.linkDriver(&driver);
// link current sense and the driver
current_sense.linkDriver(&driver);
// set control loop type to be used
motor.controller = MotionControlType::torque;
motor.torque_controller = TorqueControlType::foc_current;
// SVPWM modulation type is much more efficient for hybrid stepper motors
motor.foc_modulation = FOCModulationType::SpaceVectorPWM;
// controller configuration based on the control type
motor.PID_velocity.P = 0.05f;
motor.PID_velocity.I = 1;
motor.PID_velocity.D = 0;
// default voltage_power_supply
motor.voltage_limit = 12;
// velocity low pass filtering time constant
motor.LPF_velocity.Tf = 0.01f;
// angle loop controller
motor.P_angle.P = 20;
// angle loop velocity limit
motor.velocity_limit = 20;
// comment out if not needed
motor.useMonitoring(Serial);
// current sense init and linking
current_sense.init();
motor.linkCurrentSense(¤t_sense);
// initialise motor
motor.init();
// align encoder and start FOC
motor.initFOC();
// subscribe motor to the commander
command.add('M', doMotor, "motor");
// Run user commands to configure and the motor (find the full command list in docs.simplefoc.com)
Serial.println("Motor ready.");
_delay(1000);
}
void loop() {
// iterative setting FOC phase voltage
motor.loopFOC();
// iterative function setting the outter loop target
motor.move();
// motor monitoring
motor.monitor();
// user communication
command.run();
}