On this page
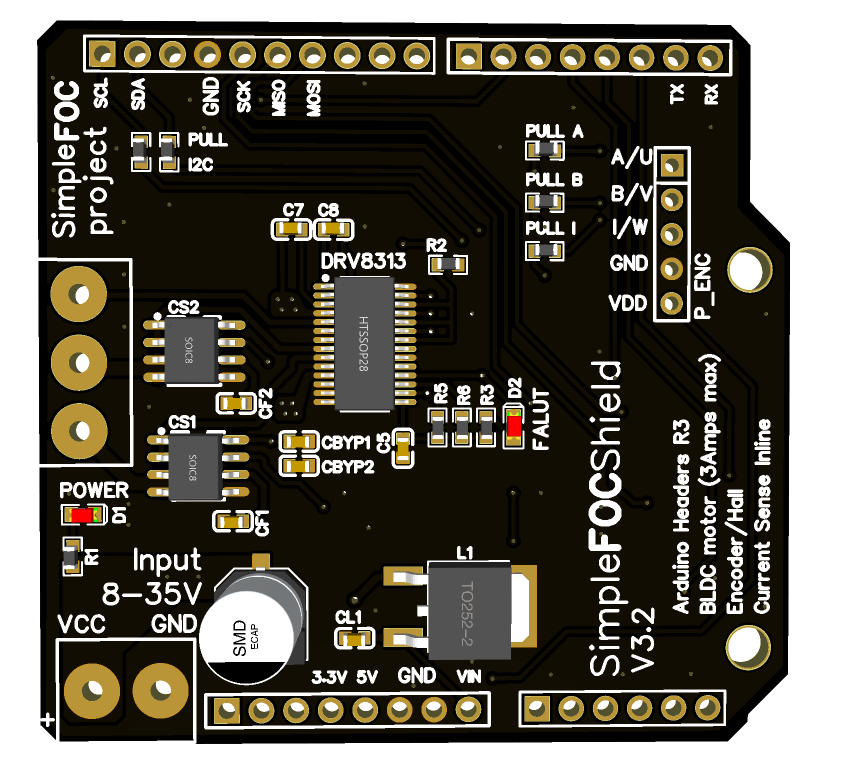
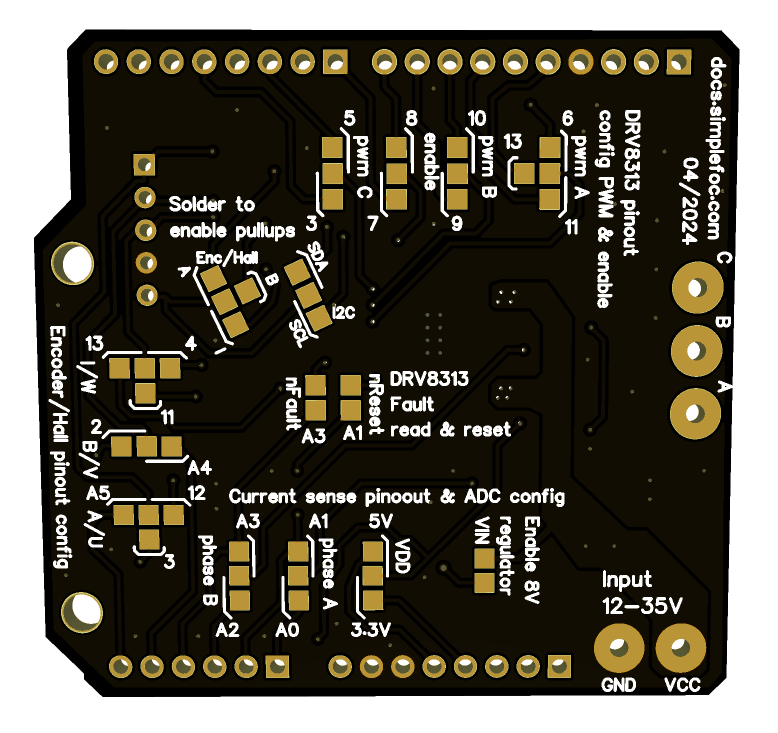
Fabrication guide for SimpleFOCShield v3.x
Here is a quick guide how to fabricate the Arduino SimpleFOCShield version V3.2
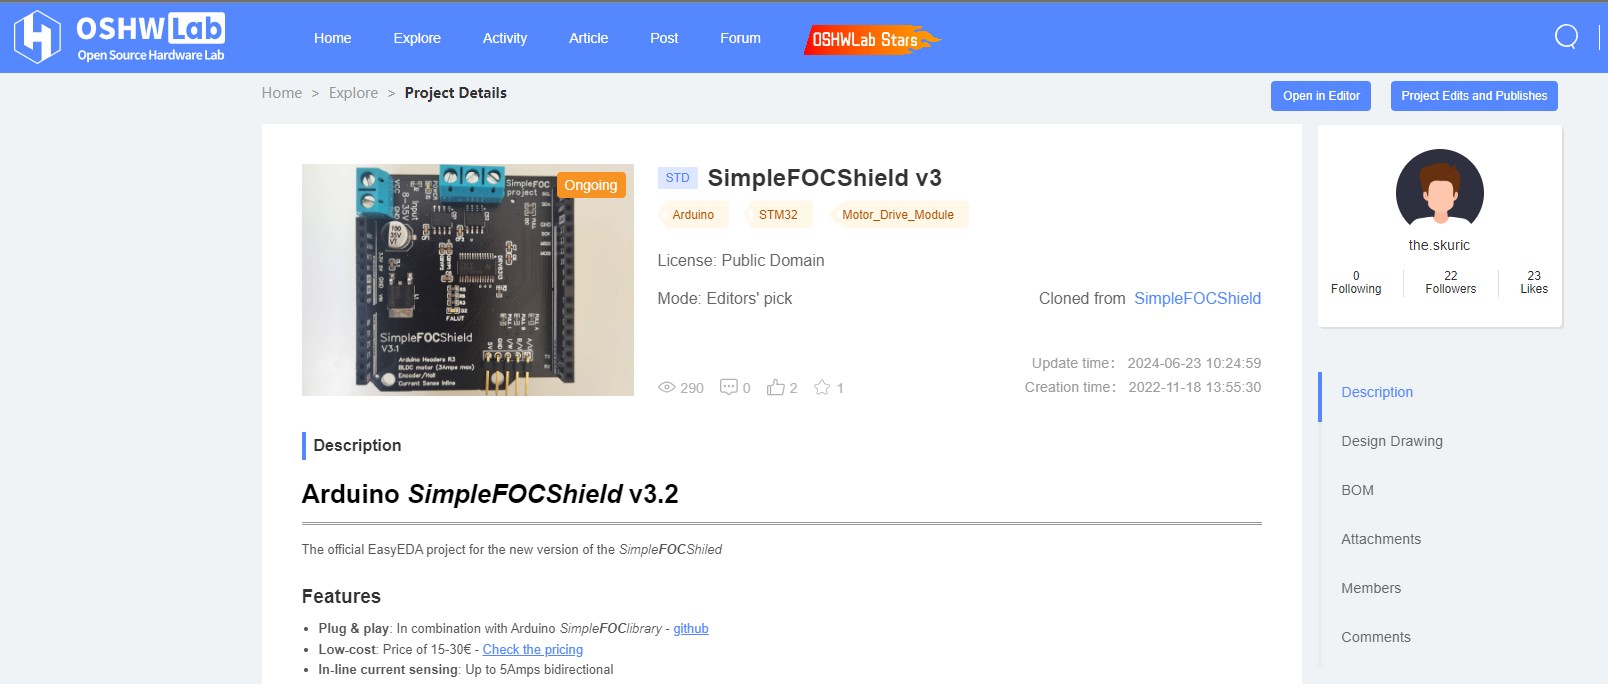
📢 Official Easy EDA project here
Board releases
To check the release timeline, click here
| Version | link | Release date | Comment |
|---|---|---|---|
| SimpleFOCShield v3.1 | release v3.1 | 10/22 | - Complete redesign - Transition to DRV8313 - Transition to ACS712 - Smaller footprint: 56mm x 53mm - Fault and reset pins exposed (optional) - Fault led indication - Fully developed using EasyEDA |
| SimpleFOCShield v3.2 | release v3.2 | 04/24 | - Official release - Resolved the bug #9 |
Github repository contains:
- Schematics - PDF file
- Gerber - Gerber, NC Drill & Assembly files
- Bill Of Materials (BOM) - Excel sheet
- 3D model - 3D PDF & STEP file
- PCB design project - EasyEDA/Altium Designer
Fabrication procedure and cost
The price of the fabrication will highly depend of the number of boards and the companies you decide to use both as PCB manufacturers and the component suppliers. Here are two nice articles explaining how to approach the problem choosing the PCB manufacturer form electronics-notes.com and component supplier from electronics-notes.com. But in most of cases it will always boil down to the price :)
In general there are two main ways to fabricate the board:
- PCB fabrication + Self assembly - Read more
- PCB fabrication and assembly service
PCB fabrication + Self assembly
The version v3 of the shiled does not longer use big SMD components as the versions v1 nad v2 did. So this version is a bit more demanding to self fabricate as all the resistors, capacitors and diods have 0603 footprint (as oposed to 1206 for v1 and v2). However, if you are interested in this way of producing this board here is a quick guide how to make it.
PCB fabrication
Download the gerber files and provide them to your PCB manufacturer of choice. So far I have used seeedstrudio and JLCPCB. The price of 10 PCBs is around 5$ but the shipping was around 20$.
| Quantity | SeedStudio | JLCPCB |
|---|---|---|
| 5 | 5€ | 2€ |
| 10 | 5€ | 2€ |
| 30 | 30€ | 15€ |
| 50 | 50€ | 30€ |
On top of these prices you will have to pay shipping of approximately 20€.
Component purchase
Here is a complete list of all the components you will need to make the board:
| Component | Description | Quantity | Manufacturer Number (Example only) |
|---|---|---|---|
| DRV8313 circuit: Datasheet | |||
| C5 | 470 nF | 1 | CC0603ZRY5V6BB474 |
| C6 | 100 uF (Electrolytic) | 1 | VT1V101M-CRE77 |
| C7, C8 | 1 uF | 2 | CL10B104KB8NNNC |
| R6, R5 | 4.7 kΩ | 2 | 0603WAF4701T5E |
| R3 | 330 Ω | 1 | 0603WAF3300T5E |
| DRV8313 | Motor driver chip | 1 | DRV8313PWPR |
| Pull Up and Pull Down resistors | |||
| PULL_SCL, PULL_SDA, R2 | 4.7 kΩ | 3 | 0603WAF4701T5E |
| PULL_A, PULL_B, PULL_I | 3.3 kΩ | 3 | RN73H2ETTD3001F50 |
| LED circuit | |||
| D1, D2 | LED (any color) | 2 | 19-213/Y2C-CQ2R2L/3T(CY) |
| R1 | 4.7 kΩ | 1 | 0603WAF4701T5E |
| Linear regulator circuit | |||
| L1 | L78M08 | 1 | L78M08ABDT-TR |
| CL1 | 0.1 uF | 1 | CC0603KRX7R9BB104 |
| Current sense circuit | |||
| CBYP1,CBYP2 | 1 uF | 2 | CL10A105KB8NNNC |
| CS1,CS2 | ACS712ELCTR-05B-T current sense amp | 2 | ACS712ELCTR-05B-T |
| Terminal connectors | |||
| TB_M1 | 3 pin, 5mm | 1 | TB002-500-03BE |
| TB_PWR | 2 pin, 5mm | 1 | TB002-500-02BE |
| Header connectors | |||
| P1, P4, P2, P3 | 8 pin, 10 pin, 6 pin female, long | 2 | sparkfun Arduino |
| P_ENC | 5 pin, male/female | 1 | 649-1012937990501BLF |
The same list ( a bit optimized for PCB manufacturers ) you can download on link Bill of Materials.
Note
The components with the manufacturers numbers I have chosen are not really set in stone, feel free to optimize them both in terms of prices and values if necessary.
Step by step guide to PCBA fabrication with JLCPCB - preferred choice 📢
Here is a quick guide how to fabricate the SimpleFOCShield board. The board has been designed using the EasyEDA software that makes it very easy to fabricate using the JLCPCB website.
Step by step guide
First step is to go to the EasyEDA’s project library and open the SimpleFOCShield project in the EasyEDA editor.
.jpg)
Then you need to open the SimpleFOCShield PCB file by clicking on it and then go to the top bar dropdown Fabrication and select One-click order PCB/SMT
.jpg)
The pop-up will show up asking if you want the Design Rule check, which is not necessary so you can click on No, continue and Order.
.jpg)
.jpg)
Once the files are generated you the new pop-up will show up and there you just click OK.
.jpg)
You will be redirected to the JLCPCB site with all the filled in entries. You just need to select he color and the quantity that you would like to manufacture.
.jpg)
Then go to the bottom of the page and and click on Confirm
.jpg)
The gerber file viewer will open, there you can click Next.
.jpg)
The BOM and CPL files should be loaded automatically so then you should be able to click Continue.
.jpg)
In the next window you will see all the components that are shown in the BOM (Bill of materials), here it’s possible that link in my case you’ll be missing some components due to the temporary shortage.
.jpg)
If that is the case search replace the missing components with the ones that are available.
- Make sure to add the footprint
0603to the search prompt - Check the in stock box
- Try checking Basic components box as well ( basic components are cheaper )
.jpg)
Once you have all your components make sure to select them all and you can click Next.
.jpg)
The next window will show the placement of the components on the board. Here you can see the components on the board and verify that they are all oriented properly. There are three components that are almost always misaligned
- LM7808 regulator
- both diodes To correct their orientation select them and click on the Rotate twice!
.jpg)
Once all the components are placed well, click on Next.
.jpg)
That is it, the hard part is done. Next window asks the reason for the order, you can select the one that fits you the best. In my case, I usually select the DIY.
.jpg)
The only thing left to do is to save it to teh cart and go through the payment and shipping information.
.jpg)
PCB fabrication and assembly service with other manufacturers
This option is a lot simpler and produces much better results. It is also even cheaper for larger quantities > 50pcs. To order the boards, download the Gerber files and Bill of Materials and supply it to your manufacturer of choice. In my case, I’m using the JLCPCB.
This video is made for v2 version of the shield but the same procedure can be used for the v3.x as well. Additionally, this video was made in 2021, in the meantime, the JLCPCB website interface has evolved a bit, but the important steps are still the same.
Fully assembled versions
Order your own fully tested and assembled Arduino SimpleFOCShield from our shop.