On this page
Monitoring (telemetry) functionality
Both BLDCMotor and StepperMotor classes support a basic telemetry function using the Serial port.
This telemetry (also called monitoring in the following documentation), will allow you to visualize key parameters from the motor using tools like the Arduino IDE serial plotter, or our SimpleFOCStudio tool.
SimpleFOClibrary monitoring is the real-time tab separated output of the motor variables to the serial terminal. It is enabled by including this line in your setup function:
motor.useMonitoring(Serial);
Note: you can also use other serial ports, e.g. Serial1, Serial2, as supported by your MCU.
At the moment, enabling monitoring using
motor.useMonitoringwill also enable debug output - see debugging for details.In a future release, debug output and telemetry output will be seperated and the
motor.useMonitoringfunction will likely be deprecated.If the debug output is undesired or causing you problems, you can disable debug output (but keep monitoring) like this:
motor.useMonitoring(Serial);
SimpleFOCDebug::enable(NULL);
Real-time motor variables monitoring
To actually produce any output you also have to add this line in to loop function:
motor.monitor()
The monitoring function can output 7 different motor specific variables:
target- current target value, specific to the motion control used (either current [A], voltage [V], velocity [rad/s], or position [rad])voltage.q- [V] - set voltage in q directionvoltage.d- [V] - set voltage in d directioncurrent.q- [mA] - measured current in q direction ( if current sense available ) or estimated current if no current sense but provided phase resistancecurrent.d- [mA] - measured current in d direction ( if current sense available )shaft_velocity- [rad/s] - motor velocityshaft_angle- [rad] - motor position
To set the preferred values to be monitored you can just change the motor.monitoring_variables parameter in the setup() function.:
motor.monitor_variables = _MON_TARGET | _MON_VEL | _MON_ANGLE; // default _MON_TARGET | _MON_VOLT_Q | _MON_VEL | _MON_ANGLE
By default the monitored variables are target,voltage.q,velocity,angle. This parameter is a bitmap with seven bit number where each bit represents a bool flag signaling if the variable should be outputted (1) or not (0). Therefore we have defined a set of helpful monitoring constants you can combine to easier handle monitoring:
#define _MON_TARGET 0b1000000 // monitor target value
#define _MON_VOLT_Q 0b0100000 // monitor voltage q value
#define _MON_VOLT_D 0b0010000 // monitor voltage d value
#define _MON_CURR_Q 0b0001000 // monitor current q value - if measured
#define _MON_CURR_D 0b0000100 // monitor current d value - if measured
#define _MON_VEL    0b0000010 // monitor velocity value
#define _MON_ANGLE  0b0000001 // monitor angle value
Furthermore, outputting the real-time execution variables using motor.monitor() function can in many cases have a negative effect on the motor performance therefore it is important to reduce the number of calls of this function as much as possible, especially if displaying many variables with lower baudrates. You can do this easily by setting the parameter motor.monitor_downsample:
// downsampling
motor.monitor_downsample = 100; // default 10
This variable tells motor.monitor() to output the variables to the serial each monitor_downsample number of calls. So in short, it will output the variables to the serial each monitor_downsample loop calls.
Here is an example of a full configuration code:
...
void setup(){
    ...

    Serial.begin(115200); // the higher the better
    motor.useMonitoring(Serial);
    //display variables
    motor.monitor_variables = _MON_TARGET | _MON_VEL | _MON_ANGLE;
    // downsampling
    motor.monitor_downsample = 100; // default 10

    ...
}
void loop(){
    ....

    motor.monitor();
}
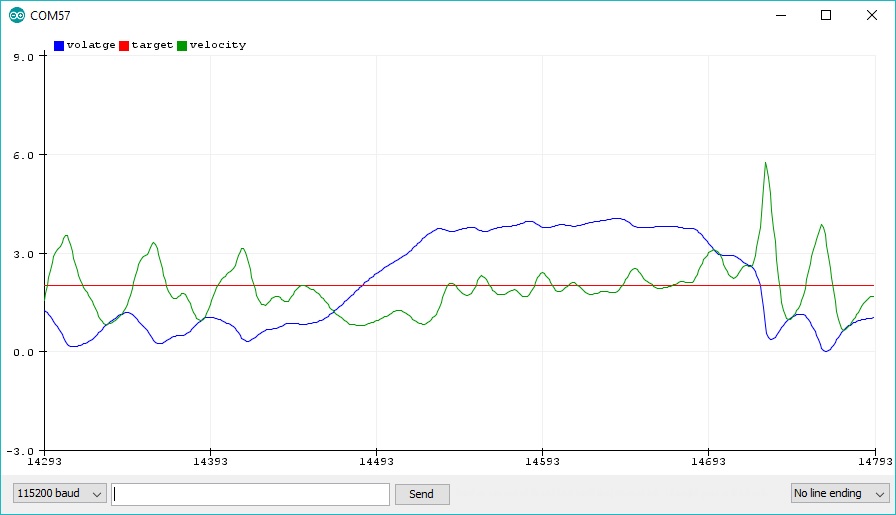
The real-time monitoring function is intended to be used for real-time visualization, particularly suitable for Arduino IDE’s Serial Plotter
Or in Serial Terminal
...
voltage,target,velocity
1.17	2.00	2.29
1.23	2.00	1.96
1.30	2.00	1.65
1.28	2.00	1.80
1.20	2.00	2.20
1.07	2.00	2.70
0.91	2.00	3.22
0.69	2.00	3.74
0.40	2.00	4.34
0.18	2.00	4.57
0.09	2.00	4.38
0.06	2.00	4.04
0.08	2.00	3.58
0.11	2.00	3.14
0.18	2.00	2.65
0.27	2.00	2.13
0.37	2.00	1.65
0.47	2.00	1.26
0.55	2.00	0.99
0.64	2.00	0.77
0.71	2.00	0.67
...
Execution time impairment
The intention of this method is to be called in main loop function along theloopFOC()andmove()function. Therefore,motor.monitor()is going to impact the execution performance and reduce the sampling frequency of the FOC algorithm so therefore take it in consideration when running the code.
Monitor output formatting
SimpleFOClibrary allows to format the monitoring output. It allows you to set the starting character, ending character, value separator character and the number of decimal places to be used for variable monitoring.
motor.monitor_start_char = '\0'; //!< monitor starting character
motor.monitor_end_char = '\0'; //!< monitor outputs ending character
motor.monitor_separator = '\t'; //!< monitor outputs separation character
The initial parameters are set so that the Arduino IDE’s serial plotter can nicely parse the variables. However if you wish to use some other serial plotter application, for example CieNTi/serial_port_plotter, you can easily adapt the monitoring format so that you can visualise motor variables in it
motor.monitor_separator= ' ';
motor.monitor_end_char= ';';
motor.monitor_start_char= '$';
Or for example for nathandunk/BetterSerialPlotter, we only need to change the separator value to the space character.
motor.monitor_separator= ' ';
Additionally, it is possible to change the number of decimal places used for the display monitored variables using the monitor_decimals variable. By default it’s set to 4.
motor.monitor_decimals = 4; //!< monitor outputs decimal places
Custom serial terminal monitoring
If you wish to implement you own monitoring functions or just output the motor variables to the Serial terminal here are the public variables of the BLDCMotor and StepperMotor class that you can access at any time.
// current target value
float target;
// current motor angle
float shaft_angle;
// current motor velocity
float shaft_velocity;
// current target velocity
float shaft_velocity_sp;
// current target angle
float shaft_angle_sp;

// current voltage set to the motor (voltage.q, voltage.d)
DQVoltage_s voltage;
// current (if) measured on the motor (current.q, current.d)
DQCurrent_s current;
// phase voltages
float Ua, Ub, Uc;
You can access any of these variables by adding motor. before it. For example:
Serial.println(motor.shaft_angle);// print current motor position to the serial terminal
// or
Serial.println(motor.Ua); // print phase voltage Ua to the serial terminal
As you can see, monitoring works only in one direction and it assumes you will implement the user communication on your own.
Real-time user communication using motor commands
For two-way communication in between user and the motor the Arduino SimpleFOClibrary provides you with the Motor commands interface.